Playroom Makeover on a Budget: Zones, Storage and Labels
A good playroom is mostly editing, not shopping. Here is a seven-step plan that starts with clearing, uses secondhand storage and ends with a ten-minute reset.
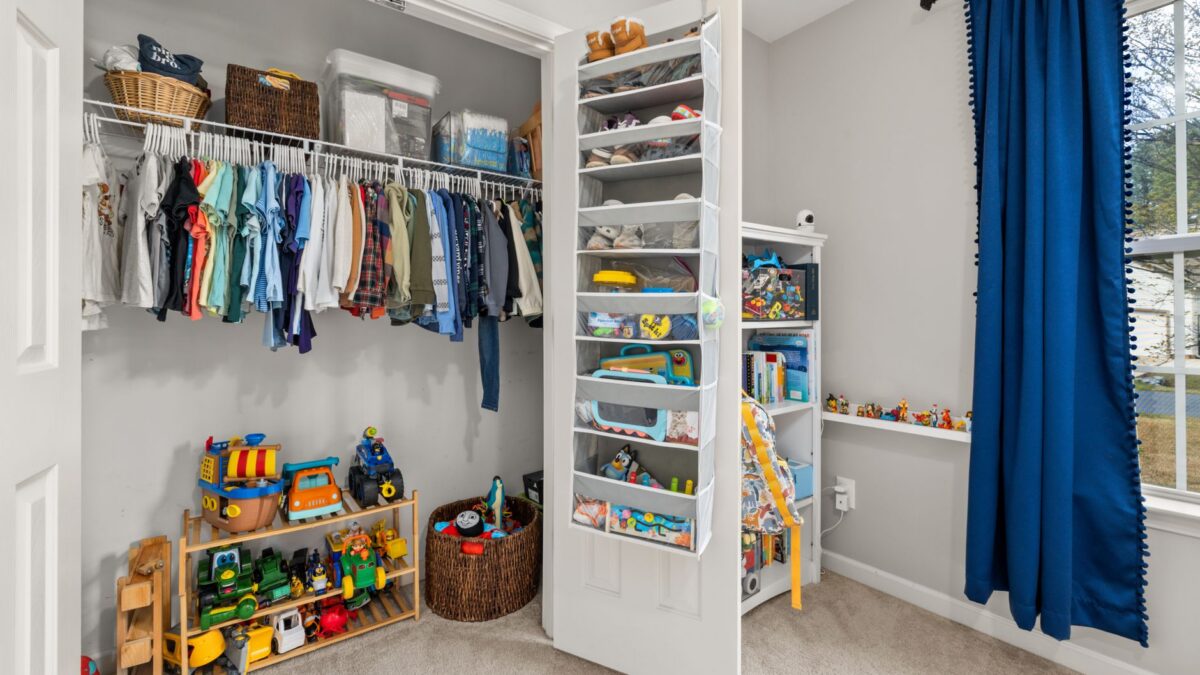
The cheapest playroom makeover starts with clearing out, not shopping. Sort toys into keep, donate and store, then divide the room into a few zones, add low open storage (secondhand works well) and label every bin. Most of the work is free, and what you buy can be small. The plan below has seven steps, a budget table and a few safety checks that matter more than decor.
Seven steps, in order
- Empty and sort. Pull everything out and make four piles: keep out, store for rotation, donate or sell, and recycle or trash. Broken toys and puzzles with missing pieces go in the last pile. Our guide to a toy rotation system explains how to use the store pile. If the whole house needs this, see our family declutter challenge.
- Divide the room into zones. Two to five zones are enough, depending on the space.
- Set up storage. Use low, open shelves and bins that children can reach on their own.
- Label everything. Use pictures for children who cannot read yet.
- Refresh the surfaces. A washable rug, a coat of paint on one wall and better lighting go a long way.
- Add a display spot. A wall space for art keeps creations off the floor.
- Plan a ten-minute reset. A daily tidy-up keeps the room working.
Zones that work in almost any room
| Zone | What goes there | Space needed |
|---|---|---|
| Building | Blocks, construction sets, cars | A rug or mat on the floor |
| Pretend play | Costumes, kitchen toys, dolls | A corner with a small shelf |
| Art and crafts | Paper, crayons, markers, washable paint | A small table with chairs |
| Reading | Books, pillows, soft light | A bin or low shelf, with covers facing out |
| Active play | Balls, soft mats, dance space | A clear patch of floor |
In a small room, merge zones. Building and pretend play can share a rug, and art can move to the kitchen table with a supply caddy.
Cost table: free, cheap and worth the splurge
The tiers below are planning targets for how much to set aside, not price quotes. Costs vary by city and store, so check your local thrift stores and online marketplaces first.
| Step | Budget tier | Where to save |
|---|---|---|
| Sorting and donating | Free | Use boxes you already have. Sell good items locally to fund the project. |
| Shelves | Low to medium | Look for secondhand shelves, and anchor them to the wall |
| Bins and baskets | Low | Reuse shoeboxes and laundry baskets, or buy a few matching bins |
| Labels | Free to low | Print photos, or cut pictures from toy packaging |
| Rug or play mat | Low to medium | Buy secondhand and wash it, or use foam tiles on sale |
| Paint | Low | One accent wall, or use leftover paint |
| Wall art | Free | Display children’s art, or make a painted message canvas together |
Safety checks before you decorate
- Anchor furniture. The CPSC’s Anchor It! campaign recommends anchoring dressers, bookcases and TVs to the wall so they cannot tip onto a child. That applies to secondhand shelves too.
- Check secondhand items for recalls. Before buying or accepting used children’s furniture or toys, look up the product on the CPSC recalls page.
- Choose toy storage with care. Open bins and low shelves are safer than heavy chests. If you use a chest, avoid lids that can slam shut, and remove or disable any automatic latch.
- Skip window cords. The CPSC recommends cordless window coverings in homes where children live or visit. If you have corded blinds, keep furniture away from the window.
- Watch older paint. If you plan to sand or repaint older furniture, find out whether lead paint could be present before you start.
- Keep small parts separate. Store toys for older children out of reach of anyone under 3.
Storage ideas that cost little
- Low open shelves from a thrift store, with bins at child height
- Rolling carts for art supplies that can move to the table
- Hanging shoe organizers for dolls, cars or art supplies, hung securely on a wall or door
- Baskets by type such as animals, vehicles, blocks and dress-up
- Fabric bins with soft sides, which suit small spaces
Label and teach the system
- Choose a simple label for each bin: a photo, a drawing or a word.
- Let the children help make them, because they take ownership.
- Walk through the room together: This bin is for cars, and this one is for blocks.
- Practice putting away at the end of play, with a short song or a one-minute timer.
- Adjust the labels after a week. If a bin is a catch-all, split it.
Keep it from sliding back
- Do a ten-minute reset before dinner or bedtime.
- Limit what is out. Keep a smaller set of toys on display and swap them monthly.
- Use a one-in, one-out rule after birthdays and holidays.
- Make one box for art that is not ready to display and sort it each month.
For more projects, see our guide to easy DIY crafts for kids, which includes ideas for homemade bins and wall art.
Bottom line
Clear first, then add zones, low storage and labels. Buy secondhand where it is safe, anchor furniture and check recalls. A short daily reset keeps the work from disappearing.
FAQ
How much does a playroom makeover cost?
It depends on the room and what you already own. Many of the steps are free, so set a total budget before you shop and spend it on shelves and a rug first.
What should I do first?
Sort and donate. Clearing out what you do not use makes the room look better and shows you what storage you need.
Can I use a toy chest?
Open bins are simpler. If you have a chest, choose one with a safe lid support and no automatic latch, and check that it has not been recalled.
How do I involve the kids?
Let them choose labels, pick the paint color or arrange their own zone. Children keep a space tidy more willingly when they helped design it.